
Why You’ll Love This Sweetened Condensed Milk Dessert
Imagine a dessert that requires minimal effort, no baking, and only three common ingredients. That’s exactly what this easy sweetened condensed milk dessert offers! It’s perfect for those times when you need a quick treat, a last-minute potluck contribution, or simply want to satisfy a sweet craving without spending hours in the kitchen. The star of the show, sweetened condensed milk, provides a rich, creamy base that transforms into a delectable delight with just two other additions. This recipe is a fantastic way to create a memorable dessert that tastes far more complex than its simple preparation suggests. You’ll love its velvety texture and sweet, comforting flavor profile, making it a go-to for any occasion. Plus, it’s a fantastic option for beginner cooks or anyone looking for a foolproof dessert recipe.
The Magic of Sweetened Condensed Milk
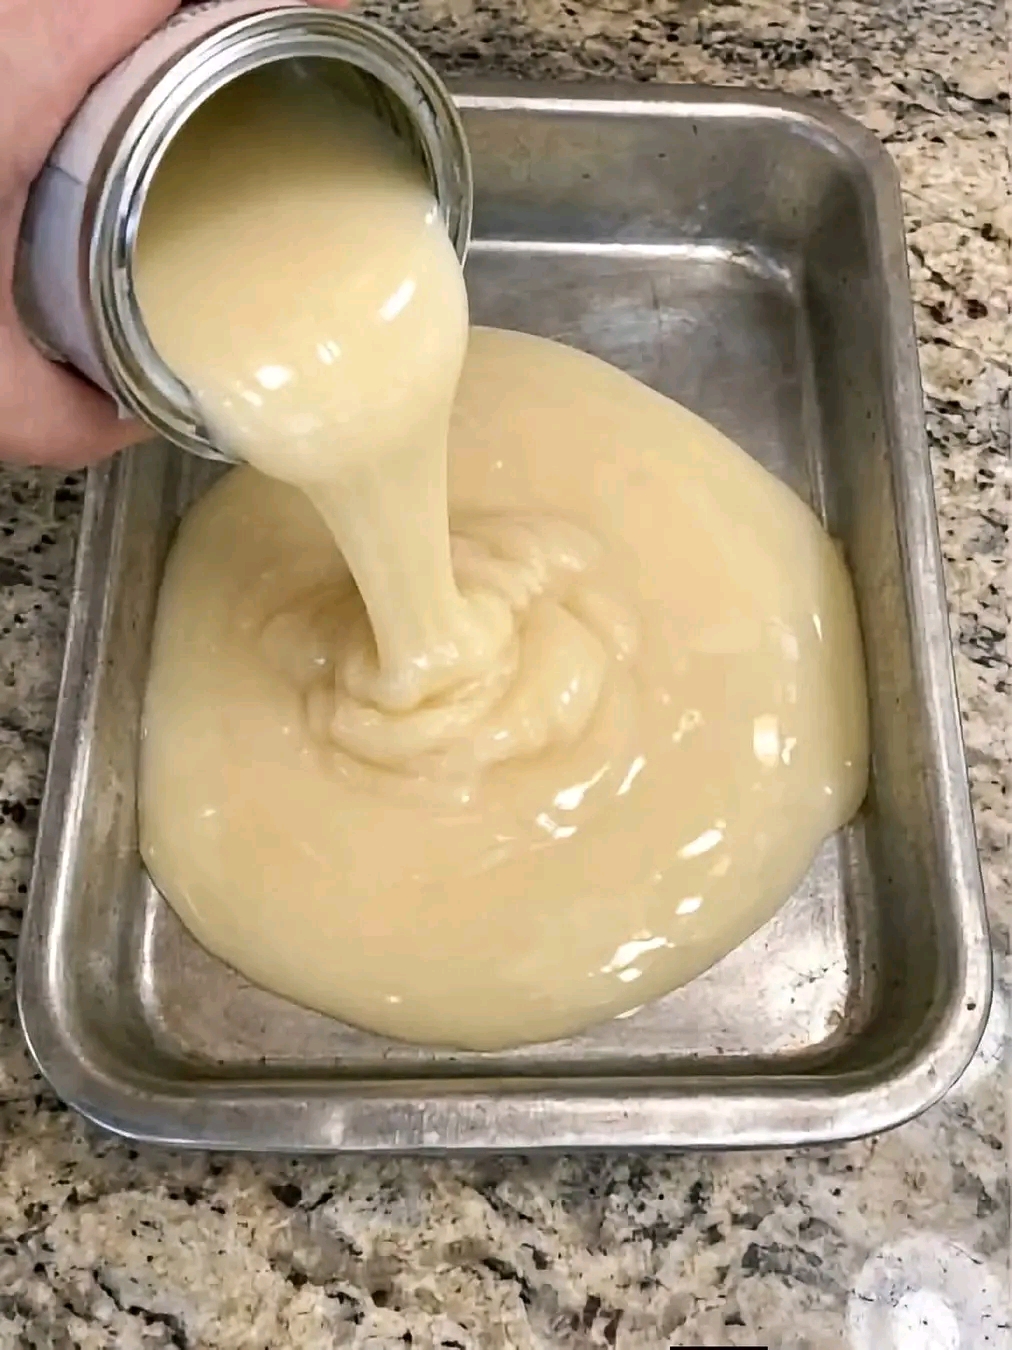
Sweetened condensed milk is a pantry staple for a reason. Its thick, viscous consistency and inherent sweetness make it an ideal base for many desserts, especially those that are no-bake. When you pour a can of raw sweetened condensed milk into a pan, as shown in the image, you’re starting with a rich foundation that needs very little extra help to become something truly special. This ingredient eliminates the need for extra sugar or complicated thickening agents, streamlining your dessert-making process. It’s truly a secret weapon for creating creamy, decadent treats with minimal fuss.
Ingredients for Your Secret Dessert
The beauty of this recipe lies in its simplicity. You only need three ingredients to create a delicious dessert that will have everyone asking for your secret.
- One (14-ounce) can sweetened condensed milk: This is the heart of our dessert, providing sweetness and a creamy texture. Make sure it’s sweetened, not evaporated milk.
- One (8-ounce) package cream cheese, softened: Cream cheese adds a tangy richness and helps to set the dessert, giving it a delightful firmness.
- One (8-ounce) container whipped topping, thawed: This lightens the mixture, making it airy and fluffy, while adding another layer of sweetness.
Ingredient Notes
For the best results, ensure your cream cheese is at room temperature. This makes it much easier to blend smoothly with the sweetened condensed milk, preventing lumps in your final dessert. If you forget to take it out ahead of time, you can soften it quickly by unwrapping it and microwaving it for 10-15 seconds. For the whipped topping, allow it to thaw completely in the refrigerator before using. Using cold, firm whipped topping will make it difficult to incorporate evenly.
How to Make the Easy Sweetened Condensed Milk Dessert
This recipe is incredibly straightforward, perfect for a quick dessert fix.
- In a large mixing bowl, combine the softened cream cheese and the entire can of sweetened condensed milk. Beat with an electric mixer on medium speed until the mixture is smooth and well combined, about 2-3 minutes. Scrape down the sides of the bowl as needed to ensure everything is incorporated.
- Gently fold in the thawed whipped topping until no streaks remain. Be careful not to overmix, as this can deflate the whipped topping and make the dessert less airy.
- Pour the mixture into an 8×8-inch or 9×13-inch baking pan (depending on desired thickness). Smooth the top with a spatula.
- Cover the pan with plastic wrap and refrigerate for at least 4 hours, or preferably overnight, until the dessert is fully set.
- Once set, slice and serve chilled.
Helpful Cooking or Baking Tips
- Ensure proper chilling: The chilling time is crucial for this no-bake dessert. Don’t rush it! A fully chilled dessert will be firm and hold its shape beautifully.
- Room temperature ingredients: As mentioned, softened cream cheese is key for a smooth mixture. Cold cream cheese will result in lumps.
- Gentle folding: When incorporating the whipped topping, use a gentle folding motion with a spatula. This preserves the airiness of the whipped topping, contributing to the light texture of the dessert.
- Pan size matters: An 8×8-inch pan will yield a thicker dessert, while a 9×13-inch pan will result in a thinner, more spread-out treat. Choose based on your preference for portion size and thickness.
Ingredient Substitutions
- Whipped topping: If you prefer to make your own, you can use homemade whipped cream. Just be aware it might not be as stable as store-bought whipped topping, so serve immediately after chilling.
- Cream cheese: While cream cheese provides a unique tang, some recipes use mascarpone cheese for a similar richness, though it will alter the flavor slightly.
Variations
This simple base is a canvas for creativity! Here are a few ideas to customize your sweetened condensed milk dessert:
- Citrus Burst: Add 1-2 tablespoons of lemon or lime juice to the cream cheese mixture for a refreshing, tangy twist. You can also add some zest.
- Chocolate Lover’s Dream: Fold in 1/2 cup of mini chocolate chips or a drizzle of chocolate syrup before chilling.
- Fruity Delight: Layer fresh berries (strawberries, blueberries, raspberries) on top before chilling, or mix in some fruit preserves.
- Coconut Twist: Add 1/2 cup of shredded coconut to the mixture for a tropical flavor.
- Cookie Crumble: Press a layer of crushed graham crackers or vanilla wafers into the bottom of the pan before adding the mixture for a delightful crust.
Serving Suggestions
This versatile dessert can be served in many ways. It’s delicious on its own, but you can elevate it with simple garnishes. Top individual slices with fresh berries, a dollop of extra whipped cream, a sprinkle of cocoa powder, or a drizzle of caramel sauce. It pairs wonderfully with a cup of coffee or tea, making it perfect for an after-dinner treat or a casual gathering. For a more elegant presentation, cut it into small squares and arrange them on a platter.
Storage and Reheating
Store any leftover sweetened condensed milk dessert in an airtight container in the refrigerator for up to 3-4 days. Because it’s a no-bake dessert, it does not require reheating. In fact, it’s best served chilled. Freezing is not recommended as it can alter the texture of the cream cheese and whipped topping, making it watery upon thawing.
Frequently Asked Questions
Can I make this dessert ahead of time?
Absolutely! This dessert is ideal for making ahead. In fact, it benefits from chilling overnight to ensure it’s perfectly set and flavors have melded.
What kind of pan should I use?
A metal baking pan, as seen in the image, or a glass baking dish works perfectly. An 8×8-inch or 9×13-inch pan is suitable, depending on how thick you prefer your dessert slices.
Can I use low-fat cream cheese or whipped topping?
While you can use low-fat versions, the full-fat ingredients will provide a richer flavor and a creamier texture. Using low-fat options might result in a slightly less decadent dessert.
Why is my dessert not setting?
The most common reasons for a dessert not setting are insufficient chilling time or not fully softening the cream cheese. Ensure you give it ample time in the refrigerator, ideally overnight, and that your cream cheese is properly softened before mixing.
Final Recipe Notes
This easy sweetened condensed milk dessert is a testament to how simple ingredients can create extraordinary flavors. It’s a wonderful recipe to have in your repertoire for those moments when you crave something sweet and satisfying without a lot of fuss. The creamy texture, delightful sweetness, and endless customization options make it a crowd-pleaser every time. Enjoy the compliments as your friends and family rave about your secret dessert – it’s our little secret!
Ingredients
- 1 (14-ounce) can sweetened condensed milk
- 1 (8-ounce) package cream cheese, softened
- 1 (8-ounce) container whipped topping, thawed
Instructions
- In a large mixing bowl, combine the softened cream cheese and the entire can of sweetened condensed milk. Beat with an electric mixer on medium speed until the mixture is smooth and well combined, about 2-3 minutes. Scrape down the sides of the bowl as needed to ensure everything is incorporated.
- Gently fold in the thawed whipped topping until no streaks remain. Be careful not to overmix, as this can deflate the whipped topping and make the dessert less airy.
- Pour the mixture into an 8×8-inch or 9×13-inch baking pan. Smooth the top with a spatula.
- Cover the pan with plastic wrap and refrigerate for at least 4 hours, or preferably overnight, until the dessert is fully set.
- Once set, slice and serve chilled.
- Prep time: 15 minutes
- Cook time: 0 minutes
- Total time: 4 hours 15 minutes (including chilling)
- Servings: 8-12 servings